
Ever looked in the mirror and felt that tug of disappointment as your hair looks thinner, frizzier, or just... not the way it used to?
You're not alone - most of us have faced a few stray strands that just won't bounce back, and that can feel pretty demoralising.
But here's the good news: damaged hair follicles can actually be coaxed back into health with the right blend of care, nutrition, and a touch of science.
So, what does "repair" really mean when it comes to those tiny pockets beneath your scalp?
Think of a follicle as a tiny garden - if the soil gets compacted or the roots starve, the plant wilts. Give it space, nutrients, and the right environment, and it can sprout again.
First off, gentle scalp massage can boost blood flow, delivering oxygen and essential building blocks straight to the follicles.
And if you've ever wondered whether a simple change in shampoo can make a dent, the answer is a resounding yes - harsh sulfates can strip away natural oils, leaving follicles vulnerable.
Switching to a sulphate-free, nutrient-rich formula not only calms inflammation but also supplies the scalp with peptides and vitamins that act like fertilizer for those roots.
Then there's the power of red-light therapy - a low-level laser that penetrates the skin, stimulating cellular activity and encouraging dormant follicles to wake up.
You might be thinking, "Do I need pricey gadgets?" - not necessarily. A consistent routine of gentle cleansing, scalp massage, and occasional light therapy can work wonders without breaking the bank.
And lets not forget diet - omega-3 fatty acids, biotin, and antioxidants are like premium feed for your follicle garden, helping repair damage from the inside out.
Ready to give your follicles the TLC they deserve? Stick with me, and we'll walk through practical steps, product tips, and simple habits that turn a lackluster scalp into a thriving canopy.
TL;DR
If your scalp feels thin and lifeless, simple steps like gentle massage, sulphate‑free shampoo, red‑light therapy and nutrient‑rich foods can revive dormant follicles. Follow our practical guide to build a daily routine that nurtures each follicle, so you’ll notice thicker, healthier hair without expensive gadgets, and confidence returns for you.
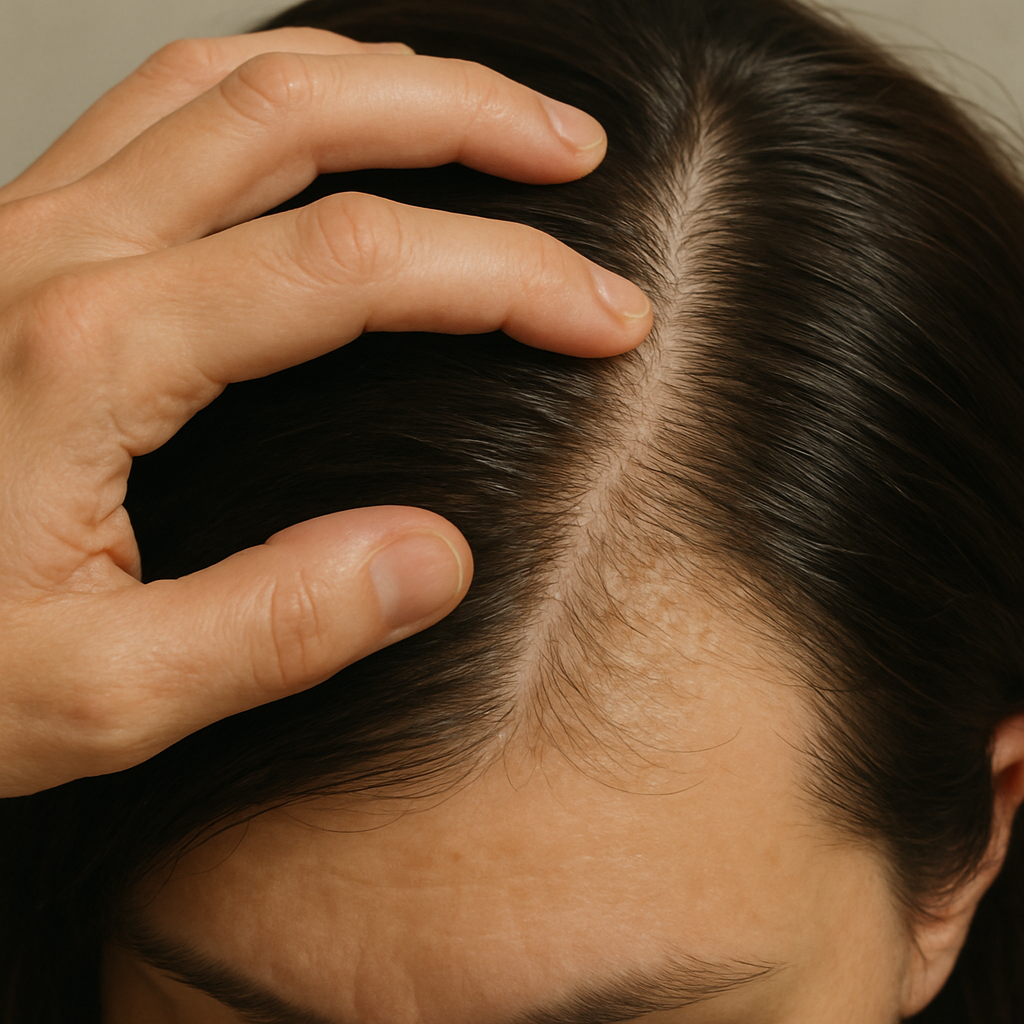
Step 1: Assess Your Scalp Health
Before you can start fixing anything, you’ve got to know what you’re dealing with. Imagine trying to water a garden without checking whether the soil is dry or soggy – you’d either drown the roots or watch them wither. The same goes for your scalp.
First, take a few minutes in the evening when the lighting is soft. Run your fingertips over your scalp and note three things: tightness, flakiness, and any spots that feel unusually smooth or raised. These little sensations are clues about inflammation, excess sebum, or clogged pores.
Check for inflammation and irritation
Red patches or a burning sensation often signal inflammation. That could be from harsh shampoos, over‑styling, or even a reaction to a new product. If you notice it, jot it down – you’ll want to avoid anything that aggravates the area.
And what about that itchy, flaky feeling? It’s usually a sign of a compromised barrier, meaning the scalp’s natural oils are stripped away. A quick visual test is to look for white flakes on your shoulders after you brush your hair.
Evaluate oil balance
Touch the crown and the sides of your head. If the crown feels greasy within a day or two, you likely have an over‑active sebaceous gland. Too dry on the sides? You might be missing essential moisture.
One practical way to gauge this is the “paper test”: press a clean tissue on different zones. If it picks up oil on the crown but stays clean on the sides, you have an imbalance that needs targeted care.
So, how do you turn these observations into action?
Actionable checklist
- Write down any redness, itch, or flakiness you feel.
- Perform the paper test on the crown, temples, and nape.
- Take a quick photo of your scalp (a mirror works) to track changes over a week.
- Note any recent product changes – new shampoo, styling gel, or even a new diet.
Once you have this baseline, you can match your findings with the right remedy. For example, if you spot clogged pores, How to Unclog Hair Follicles on Scalp: A Practical Step‑by‑Step Guide walks you through gentle exfoliation techniques that won’t irritate an already sensitive scalp.
And remember, your scalp’s health is tightly linked to what you feed it. Experts at SavvyDerm explain that proper nutrition plays a crucial role in follicle repair, so think about adding omega‑3 rich foods like salmon or flaxseed to your meals.
Ready to visualise the next step? Below is a quick video that demonstrates a simple scalp‑assessment routine you can do every night.
Watch the video, then pause and perform the checklist yourself. It only takes a couple of minutes, but those minutes pay off by giving you a clear map of where to focus your repair efforts.
Finally, schedule a weekly “scalp check‑in”. Set a reminder on your phone – Friday evenings work well for most people. During the check‑in, compare your notes and photos to see if redness is receding, oil levels are stabilising, or if new flaky patches have appeared.
Consistency is the secret sauce. By turning this simple assessment into a habit, you’ll catch problems early, adjust products before damage deepens, and give your follicles the best chance to bounce back.
Step 2: Adopt a Gentle Cleansing Routine
Now that you’ve got a clear picture of what your scalp is telling you, the next logical move is to treat it with the kind of kindness a delicate garden deserves.
Ever wondered why some shampoos leave your hair feeling like a straw‑filled broom? It’s usually because they’re packed with harsh sulfates that strip away the natural oils your follicles rely on for protection and repair. The good news is, you don’t need a fancy lab‑coat to fix that – you just need a gentle, pH‑balanced cleanse that respects the scalp’s barrier.
What makes a cleanser “gentle”?
Think of a gentle cleanser as a soft‑spoken friend: it whispers, not shouts. It should:
- Be sulphate‑free and low‑foam, so it doesn’t over‑clean.
- Contain hydrating ingredients like aloe vera or jojoba that soothe irritation.
- Have a pH close to the scalp’s natural 5.5, helping to seal the cuticle and keep moisture in.
One product that ticks all those boxes is Kavella Moisturizing Shampoo. It blends organic aloe vera, jojoba protein and jojoba esters into a creamy lather that penetrates dry strands while calming the scalp, giving your follicles a little extra love during each wash.
Step‑by‑step gentle cleansing routine
Here’s a no‑nonsense routine you can slot into your evening or morning shower without adding extra stress:
- Prep the scalp. Before you even touch the bottle, splash your hair with lukewarm water. Hot water opens the cuticle and can exacerbate dryness; lukewarm keeps things comfortable.
- Massage, don’t scrub. Pump a quarter‑size amount of the moisturizing shampoo into your palm. Using your fingertips, gently massage in circular motions for about 30 seconds. Focus on the crown and any zones you noted as oily or flaky during your assessment. This low‑pressure massage stimulates blood flow – a tiny but effective boost for follicle repair.
- Rinse mindfully. Let the water run through your hair, allowing the mild surfactants to glide away dirt without tugging. If you feel any residue, repeat the rinse once more – no need for a second wash.
- Follow with conditioner (optional). If your ends are particularly dry, apply a lightweight conditioner only to the mid‑lengths and tips. Avoid the scalp to keep the barrier breathable.
- Pat dry, don’t rub. Grab a soft towel and gently press the water out. Rubbing creates friction that can damage the cuticle and irritate an already sensitive scalp.
Sounds simple, right? Yet consistency is the real game‑changer. Aim for 2‑3 washes per week if your scalp leans dry, or every other day if you’re on the oilier side. Adjust based on how your scalp feels – the goal is a clean but never stripped feeling.
Quick checklist for a scalp‑friendly wash
- Water temperature: lukewarm.
- Shampoo amount: a pea‑size dollop.
- Massage time: ~30 seconds.
- Rinse: until water runs clear.
- Pat dry, no vigorous rubbing.
And remember, the wash isn’t just about removing grime – it’s an opportunity to reconnect with the sensations you recorded in Step 1. While you’re massaging, ask yourself, “Does this spot still feel tight?” If the answer is yes, you might want to add a once‑weekly scalp‑exfoliation routine (but keep it gentle!).
By swapping a harsh, stripping cleanser for a soothing, pH‑balanced formula, you’re essentially giving your follicles a clean slate to rebuild from. Over time you’ll notice less redness, reduced flakiness, and—most importantly—hair that feels stronger from root to tip. That’s how to repair damaged hair follicles, one gentle wash at a time.
Step 3: Apply Nutrient‑Rich Treatments
Now that your scalp is clean and the barrier is respected, it’s time to feed the follicles the good stuff they’ve been missing.
Think of a nutrient‑rich treatment as a fertiliser‑sprinkle – it sits on the surface, seeps down, and gives the roots the vitamins, minerals and peptides they need to rebuild strong strands.
We’ll focus on three easy‑to‑source categories: protein‑boosting serums, oil‑based scalp masks, and water‑soluble boosters that you can mix into your post‑wash routine.
Protein‑rich serums
A serum packed with hydrolysed keratin or plant‑based proteins works like a quick‑release snack for dormant cells. Apply a few drops to a dry scalp, massage gently, and let it absorb before you reach for a towel.
If you’re after something you can leave on overnight, look for serums that contain copper‑peptide‑1 – studies show it can stimulate follicle stem cells and improve density over a few weeks.
Oil‑based scalp masks
Oils are the slow‑release carriers that lock moisture in and deliver fatty acids straight to the hair follicle’s sebaceous gland.
A simple mask of warm coconut oil, a drizzle of rosemary essential oil and a pinch of sea‑salt works wonders. Warm the blend until it’s just above skin temperature, part your hair, and spread the mixture onto the scalp using your fingertips.
Leave it on for 20‑30 minutes, then rinse with lukewarm water. You’ll notice less tightness and a smoother feel, because the oil replenishes the lipids that harsh shampoos strip away.
Water‑soluble boosters
For a quick daily pick‑me‑up, dissolve a teaspoon of powdered biotin, silica or a vegan collagen blend in the water you use to rinse your hair. The nutrients are absorbed through the wet cuticle, giving the follicles a tiny burst of building blocks each shower.
If you prefer a ready‑made spray, look for formulas that list panthenol, niacinamide or caffeine near the top of the ingredient list – those act as vasodilators and help blood flow right where you need it.
Here’s a quick checklist to keep your nutrient routine on track:
- Choose a serum with peptides or keratin – apply after washing, before towel‑dry.
- Do a weekly oil mask – warm, apply, wait 20‑30 minutes, rinse.
- Add a water‑soluble booster to every rinse or use a spray on damp hair.
- Track how your scalp feels – less tightness, less flakiness, more bounce.
By layering these nutrient‑rich steps on top of the gentle cleanse you already have, you’re basically feeding your follicles a balanced diet that supports repair from the inside out.
Give it a few weeks and you’ll start to notice less shedding, a softer scalp, and those fine hairs that once looked stuck finally starting to grow.
How often should you repeat each step? For most people, a serum works best when applied every other day, the oil mask once or twice a week, and the water‑soluble boost with every wash. If your scalp feels overly oily, scale back the serum and focus on the mask’s nourishing oils. Conversely, if you’re battling dryness, add an extra boost on non‑wash days by simply massaging a few drops of serum onto the scalp.
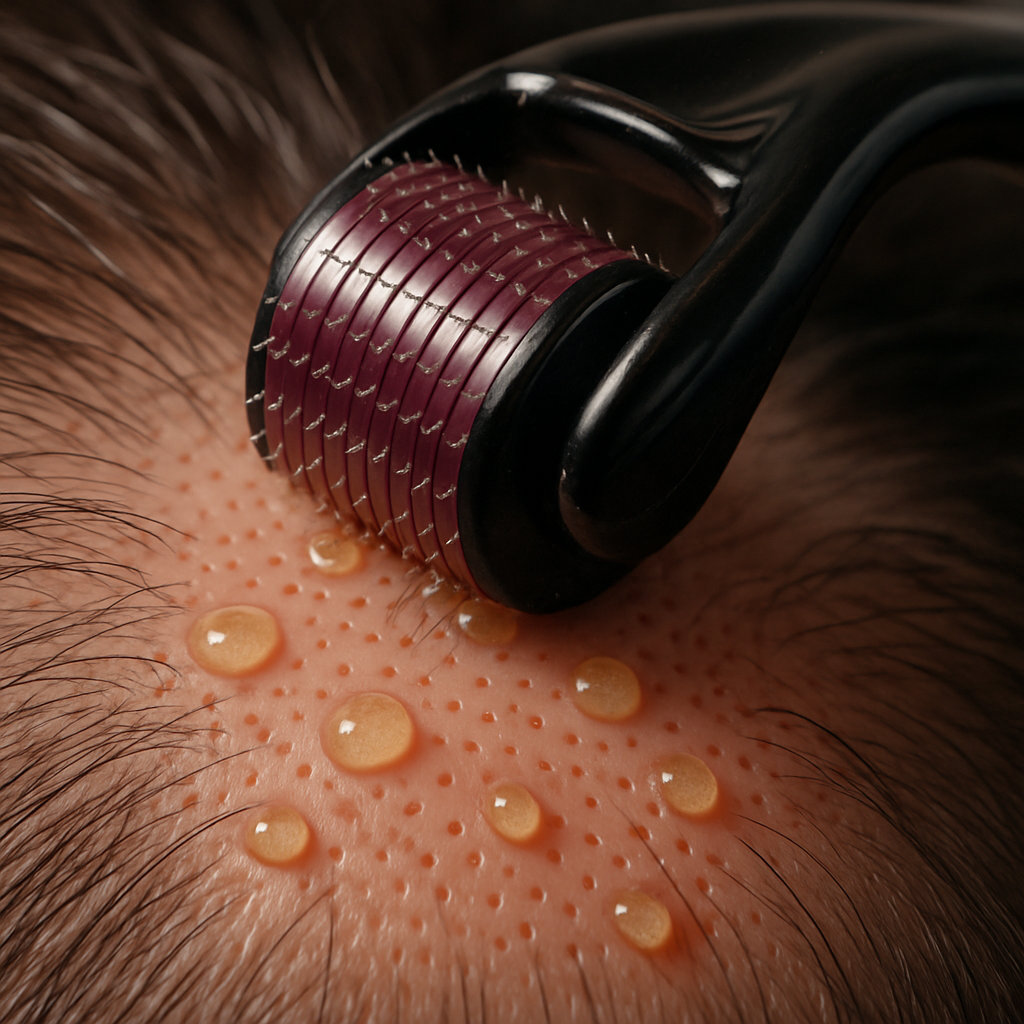
Step 4: Use Microneedling & Scalp Stimulation
If you’ve ever felt that tiny prickle on your scalp after a good massage and wondered if it could actually do more than just feel nice, you’re about to discover why microneedling is a game‑changer in how to repair damaged hair follicles.
The idea is simple: tiny needles create micro‑channels in the skin, prompting a controlled wound‑healing response. Your body rushes platelets, growth factors and oxygen to the area – exactly what dormant follicles need to wake up.
Before you reach for a derma‑roller, take a minute to assess your scalp’s tolerance. If you’ve got active inflammation, open sores or severe sensitivity, start with a gentle scalp massage for a week before you needle.
Here’s a quick step‑by‑step guide you can slot into your existing routine.
What you need
A 0.25 mm derma‑roller (the shortest length works for most people), a clean towel, a few drops of your favourite peptide serum, and a calm space where you won’t be interrupted.
Step 1 – Prep the scalp
Wash your hair with the gentle sulphate‑free shampoo you’ve been using in Step 2, then pat dry until the scalp is just damp. No hot water – it can make the skin too pliable and increase discomfort.
Step 2 – Roll gently
Divide your scalp into four quadrants. Starting in the crown, roll the derma‑roller vertically 6‑8 times, then horizontally the same number of times, and finally diagonally. Apply just enough pressure that you feel a faint “ping” – you don’t want to bruise the skin.
If you’re new to this, begin with just one pass per direction and gradually build up as your scalp gets used to the sensation. Most people find 2‑3 sessions per week enough to see a subtle lift in density after a month.
Step 3 – Feed the fresh channels
Immediately after rolling, dab 3‑4 drops of your peptide serum onto the treated zones. The micro‑holes act like tiny doors, letting the active ingredients bypass the cuticle and reach the follicle base where they can stimulate growth.
Give the serum a minute to absorb, then let your hair air‑dry. Avoid heat tools for the next 24 hours – they can close the channels before the nutrients have a chance to settle.
Step 4 – Consistency is key
Treat your scalp no more than three times a week; over‑doing it can trigger irritation and actually set back the repair process. Pair microneedling with the nutrient‑rich steps from Step 3 and you’ll create a cycle of stimulation‑then‑nourishment that many clinicians call ‘the gold standard’ for follicle revitalisation.
Track progress by taking photos every two weeks and noting any change in hair‑pull strength or scalp tightness. After a month you should notice less shedding and a slightly fuller feel – that’s the early sign that your follicles are waking up.
Safety tips & troubleshooting
Safety first – always sanitise your roller with 70% isopropyl alcohol before and after each use. Let it air‑dry on a clean towel; a wet roller can harbour bacteria and cause unwanted breakouts.
If you notice redness lasting more than a day, scale back to once a week and focus on soothing ingredients like aloe or oat extract. Persistent irritation may mean the needle length is too long for your scalp type – drop down to 0.15 mm and see how it feels.
Remember, microneedling isn’t a miracle cure on its own; it works best when paired with the gentle cleansing and nutrient‑rich treatments you’ve already built into your routine.
Step 5: Adjust Lifestyle and Diet
Alright, you’ve already got the scalp clean, the nutrients in place, and the micro‑channels primed. The next piece of the puzzle is what you do when the shower’s turned off – your daily habits and what lands on your plate.
Does it feel weird that something as simple as a morning walk could boost hair growth? Not at all – circulation is the delivery truck for oxygen and nutrients, and every step you take keeps that truck running.
Here’s a quick lifestyle checklist you can stick to without turning your life upside down:
- Aim for 7‑8 hours of sleep – deep REM cycles release growth‑factor hormones that coax dormant follicles awake.
- Stay hydrated; 2‑3 litres of water a day helps transport minerals like zinc and iron straight to the scalp.
- Fit in 20‑30 minutes of moderate cardio three times weekly – think brisk walking, cycling, or dancing in your living room.
- Limit alcohol and quit smoking; both constrict blood vessels and sabotage nutrient delivery.
- Manage stress with meditation, deep‑breathing or a hobby you love – cortisol spikes can push hair follicles into the ‘resting’ phase.
Notice how each habit either opens a new lane for blood flow or removes a roadblock that was keeping nutrients at bay.
Now let’s talk food – think of it as premium fuel for your follicle garden. You don’t need to become a vegan chef overnight, just sprinkle in the right power‑foods.
Key nutrients and where to find them
Protein is the building block of keratin, so aim for 1‑1.2 g per kilogram of body weight daily. Good sources include chicken breast, lentils, Greek yoghurt and eggs.
Omega‑3 fatty acids calm inflammation and improve scalp circulation. Grab a serving of salmon, sardines, walnuts or a spoonful of flaxseed oil a few times a week.
Biotin, zinc and iron are the trio that keeps hair in the growth phase. A handful of pumpkin seeds, a slice of lean beef, or a fortified cereal can fill those gaps without a pricey supplement.
If you’re vegetarian or vegan, pair iron‑rich plants with vitamin C – a squeeze of lemon on a bean salad boosts absorption dramatically.
Don’t forget fibre – it keeps your gut healthy, and a happy gut means better nutrient uptake. Aim for colourful veg, whole grains and a daily apple or pear.
Quick tip: keep a simple food journal for a week. Jot down what you eat, how you feel, and any changes in hair shedding. Patterns pop up fast, and you can tweak one thing at a time.
So, what should you do tonight? Brew a calming herbal tea, set a reminder for a 20‑minute walk tomorrow, and add a serving of salmon to dinner. Small, consistent actions add up, and before you know it your follicles will be thanking you.
Finally, protect your scalp while you sleep. Switch to a silk pillowcase to reduce friction, and keep the bedroom cool – heat can increase scalp oil production and invite irritation.
Stick to this routine for at least six weeks and you’ll start seeing less shedding, a softer scalp, and the early signs of thicker strands. Patience pays, but the results are worth every mindful habit.
| Lifestyle Factor | Action | Simple Tip |
|---|---|---|
| Sleep | 7‑8 hours of quality rest | Set a consistent bedtime alarm |
| Hydration | 2‑3 litres of water daily | Keep a reusable bottle at your desk |
| Exercise | 20‑30 min cardio 3×/week | Take a brisk walk after lunch |
| Stress Management | Daily mindfulness or hobby | Use a 5‑minute breathing app |
| Nutrition | Protein, omega‑3, biotin, zinc, iron | Add a salmon fillet or lentil soup to dinner |
Step 6: Ongoing Maintenance and Monitoring
So you’ve got the scalp clean, the nutrients flowing, and the micro‑needles doing their magic – now the real test begins: keeping everything on track without turning your bathroom into a lab.
Why ongoing care matters
Think of your hair follicles like a garden you’ve just planted. A single good watering session won’t make a forest; you need regular attention, or the weeds (dryness, excess oil, stress) will creep back.
When you skip a week of gentle cleansing or forget the weekly oil mask, you’ll often notice a subtle uptick in shedding or that familiar tightness on the crown. Those tiny signals are your scalp’s way of saying “hey, I need a refill”.
Set up a simple monitoring routine
Pick a day – Friday evenings work for most people because the week is winding down and you can reflect on how your scalp felt during the work‑day hustle.
Grab a small notebook or a notes app and answer three quick questions: How does my scalp feel? Any new flakiness or oil patches? Did I notice any change in hair‑pull strength?
Take a quick selfie in natural light, focusing on the crown and temples. You don’t need a fancy camera – a phone works fine. Compare this photo with the one you took after Step 1; the visual cue is often more honest than a feeling.
Tools & tricks to keep track
Set a recurring reminder on your phone: “Scalp check‑in”. When it buzzes, spend two minutes massaging the scalp with your fingertips – just enough to feel temperature and tension, not enough to cause irritation.
If you enjoy data, use a simple spreadsheet: column A for the date, B for “feel”, C for “oil level” (paper test score), D for “shedding count” (how many strands you pull out when you brush). Over a month, trends become obvious.
For those who love visual aids, colour‑code your photos – green for “good”, amber for “needs attention”, red for “stop and adjust”. This colour system turns a vague impression into an actionable signal.
Adjusting when things shift
Notice a spike in oil on the crown after a weekend of indulgent meals? Try cutting back the frequency of your scalp‑massage to once every other day and add a clarifying rinse (a diluted apple‑cider‑vinegar spray works wonders).
Feeling tighter after a new stressor at work? Slip in an extra five‑minute breathing exercise before bedtime and consider a short, low‑intensity walk after lunch to boost circulation.
If you see increased flakiness, double‑check your shampoo’s ingredient list – even “sulphate‑free” formulas can contain drying alcohols. Swap to a more hydrating cleanser for a week and watch the flakes recede.
Quick maintenance checklist
- Morning: Light scalp massage (30 sec) while you sip coffee.
- Evening wash: Follow the gentle routine from Step 2.
- Weekly: Apply the oil mask, then rinse.
- Friday: Take a photo, note sensations, log data.
- Monthly: Review trends, adjust product frequency, celebrate small wins.
Remember, the goal isn’t perfection; it’s consistency. Even on “off” days, a five‑minute finger‑roll is better than nothing, and those tiny habits compound into stronger, healthier follicles over time.
So, what’s the next move? Grab your phone, set that Friday reminder, and give your scalp the ongoing love it deserves. Your future self – with thicker strands and a calmer scalp – will thank you.
Conclusion
We've walked through the whole garden – from spotting the first signs of stress on your scalp to feeding the roots with gentle cleansers, nutrient‑rich serums and a bit of microneedling.
So, what does it actually feel like when you finally understand how to repair damaged hair follicles? Imagine waking up, running your fingers through a scalp that no longer feels tight, and seeing a few extra strands that stay where you want them.
The trick is consistency, not perfection. A five‑minute massage while your coffee brews, a once‑a‑week oil mask, and a quick check‑in on Friday keep the cycle moving.
Got a busy week? Swap the evening routine for a quick morning roll‑on serum and still give the follicles the boost they need.
Remember, every tiny habit compounds. Even on “off” days, a brief finger‑roll is better than nothing, and over weeks you’ll notice less shedding, softer skin and that subtle thickening you’ve been hoping for.
And if you ever feel stuck, revisit this guide – the steps are simple, flexible, and designed to fit real life.
Ready to put the plan into action? Set your first reminder tonight, grab your favourite gentle shampoo, and give your scalp the love it deserves – your future self will thank you.
FAQ
Below are some of the most common questions we hear about how to repair damaged hair follicles, with practical answers you can start using today.
What actually causes hair follicles to become damaged?
Hair follicles get damaged when they’re exposed to chronic stress, harsh chemicals, or a lack of essential nutrients. Repeated friction from tight hairstyles, over‑washing with sulphate‑laden shampoos, and inflammation caused by scalp conditions can strip the protective lipid layer. Over time the follicle’s stem cells lose their ability to produce strong, healthy strands, leading to thinning and break‑away.
Can I repair damaged follicles at home without expensive tools?
Absolutely – you don’t need a pricey laser to see improvement. Consistent gentle cleansing, regular scalp massage, and nutrient‑rich serums can reactivate dormant cells. Adding a weekly oil mask or a short microneedling session amplifies blood flow and nutrient delivery. The key is sticking to a simple routine that fits your schedule, not chasing the latest gadget.
How often should I massage my scalp for best results?
A 2‑3 minute massage each day is enough to boost circulation without irritating the scalp. Focus on gentle circular motions with your fingertips, especially on the crown and any tight spots you noted during your assessment. If you’re short on time, even a 30‑second finger roll while your coffee brews can make a noticeable difference over weeks.
What ingredients should I look for in a shampoo to help repair follicles?
Look for sulphate‑free formulas that balance pH around 5.5 and contain soothing humectants like aloe vera or glycerin. Peptide complexes, biotin, and panthenol are bonus ingredients because they feed the follicle’s building blocks. Avoid heavy silicones and drying alcohols – they can coat the scalp and block nutrient absorption, undoing the repair work you’ve put in.
Is microneedling safe for everyone and how do I start?
Microneedling is safe for most people once you start with a short 0.25 mm roller and keep the pressure light. Begin with one pass per direction on a clean, damp scalp, then apply a peptide serum to the fresh channels. If you notice persistent redness or soreness, drop back to once a week or switch to a 0.15 mm device until your skin adapts.
Do diet and supplements really make a difference for follicle repair?
Nutrition fuels the cells that rebuild your follicles. Omega‑3 fatty acids from fish or flaxseed calm inflammation, while protein supplies the keratin backbone. Biotin, zinc and iron improve the hair growth cycle, so aim for a balanced diet rather than relying on a single supplement. Tracking what you eat for a week can highlight gaps you can fill with foods or a modest multivitamin.
How can I tell if my repair routine is actually working?
Start a simple log: note the date, how your scalp feels, any shedding you see, and a quick photo in natural light. After two weeks, look for trends – less tightness, fewer flakes and a modest increase in hair‑pull strength are good signs. If nothing changes after a month, consider tweaking one variable at a time, like adding an oil mask or adjusting your shampoo frequency.