
Ever stood in front of the mirror, running your fingers through thinning strands and thought, ‘There has to be something simple I can do?’
If you’re over 30 and watching your hair slowly lose its bounce, you’re not alone – hair loss can feel like a quiet, unwelcome guest that shows up just when you’re busy juggling work, family, and the occasional weekend escape.
One of the most surprisingly gentle yet effective tricks we’ve seen in our own Julian Jay lab is rosemary oil. It’s not a miracle cure, but when you know how to use rosemary oil for hair growth, it can become a steady ally in the battle against thinning.
So, what’s the science behind it? Rosemary contains compounds like rosmarinic acid and cineole that stimulate blood circulation in the scalp, delivering more nutrients to dormant follicles. Think of it as a mini‑massage for your roots, encouraging them to wake up and do their thing.
In practice, the easiest way to start is with a few drops mixed into a carrier oil – coconut, jojoba, or even our own hair‑boosting serum. You’ll want to keep the concentration low, around 3‑5 % rosemary to carrier, to avoid any scalp irritation.
Here’s a quick routine you can fit into your shower or bedtime ritual: after washing, towel‑dry your hair, then massage the blend into your scalp for a minute or two. The warmth of your skin helps the oil penetrate, and the gentle motion boosts circulation – a double win.
You might wonder, ‘How often should I do this?’ Most of our clients find that three times a week is enough to notice a subtle thickening after a month or so. Consistency beats occasional over‑enthusiasm every time.
And remember, rosemary oil works best when paired with a balanced diet, stress management, and a quality shampoo that doesn’t strip your scalp. It’s not a stand‑alone miracle, but part of a broader, realistic hair‑care strategy.
Ready to give it a try? Grab a small bottle, mix it up, and give your scalp that gentle, aromatic boost. In the next sections we’ll walk through the exact measurements, storage tips, and how to combine rosemary with other proven ingredients for even better results.
TL;DR
If you’re over 30 and noticing thinning strands, a simple rosemary oil scalp massage three times a week can gently boost circulation and support hair growth.
Combine the blend with a balanced diet, low‑stress lifestyle and a gentle, sulphate‑free shampoo for the best chance of thicker, healthier hair in you.
Step 1: Choose a High‑Quality Rosemary Oil
When you first pop open a bottle of rosemary oil, you might think “any old oil will do.” But if you’ve spent years wrestling with thinning hair, you know the difference between a shortcut and a genuine solution. The first step is to make sure the oil you’re about to massage into your scalp is truly high‑quality – pure, potent, and safe.
Start by scanning the label. Look for terms like “therapeutic grade,” “100% pure,” or “organic.” If the bottle mentions a cold‑pressed extraction, that’s a good sign the delicate compounds – rosmarinic acid, cineole, and carnosic acid – haven’t been destroyed by heat. Avoid anything that lists synthetic fragrances, fillers, or carrier oils as the primary ingredient.
Check for third‑party testing
Reputable brands will often provide a link to a GC/MS (gas chromatography‑mass spectrometry) report. That report is basically a fingerprint confirming the oil’s composition. If the manufacturer is proud enough to share it, you can trust that the oil hasn’t been diluted with cheap vegetable oil. A quick Google search for “GC/MS report rosemary oil” should pull up the PDF – if it’s missing, move on.
Another red flag is price. Pure rosemary essential oil typically costs between £12‑£20 for a 10 ml bottle. If you see a “deal” that seems too good to be true, it probably is, and you’ll end up with a product that’s mostly carrier oil and a sprinkle of rosemary.
Consider the source
Where the rosemary is grown matters. Mediterranean climates produce the most aromatic plants, but you’ll also find high‑quality UK‑grown organic rosemary these days. Look for certifications like “EU organic” or “UK Soil Association.” These labels tell you the plant wasn’t sprayed with pesticides that could irritate a sensitive scalp.
And here’s a tip from our own testing: we’ve found that oils bottled in dark amber glass preserve potency better than clear plastic. Light can break down the active compounds, turning a potent elixir into a bland scent.
Once you’ve narrowed down a few contenders, you might wonder how to compare them. A simple sniff test can be surprisingly telling – a genuine rosemary oil should smell fresh, piney, and slightly citrusy, not sharp or chemically sweet. If it smells off, trust your nose and set it aside.
Need a quick reference? The natural remedies guide breaks down what to look for in essential oils, including rosemary. It’s a handy checklist you can print and keep next to your bathroom shelf.
Now that you’ve got a quality oil in hand, it’s time to think about how you’ll blend it. Most of our clients use a carrier like jojoba or fractionated coconut – both are lightweight, non‑comedogenic, and let the rosemary do its work without clogging pores.
And if you enjoy turning your hair routine into a little self‑care ritual, consider pairing the massage with a warm, aromatic soak. The relaxing bath tips article explains how a gentle steam can open up the follicles, letting the oil penetrate deeper.
Below is a short video that walks you through the exact steps of selecting and preparing your rosemary oil blend. Pause, take notes, and feel free to rewind – the technique matters as much as the ingredient.
While the video shows the basics, remember that each scalp is unique. If you notice any tingling or redness, dilute a bit more or switch to a milder carrier. Consistency, not intensity, is the secret sauce for long‑term growth.
For a broader perspective on holistic wellness, the wellness blog frequently covers how essential oils fit into a balanced lifestyle, from stress reduction to circulation support – all of which feed into healthier hair.
Ready to make your first purchase? Grab a small 10 ml bottle, check the label against our checklist, and you’ll be set to start the scalp massage routine that’s at the heart of our hair‑growth protocol.
Step 2: Dilute with a Carrier Oil
Alright, you’ve got that pure rosemary essential oil on hand – now it’s time to make it skin‑friendly. Essential oils are powerhouses, but they’re also super concentrated, so you’ll want to blend them with a carrier oil before you work them into your scalp.
Why a carrier oil matters
Carrier oils do more than just dilute. They bring their own nutrients, antioxidants and moisturising fats that complement rosemary’s circulation‑boosting compounds. Think of it as a tag‑team: rosemary wakes the follicles up, while the carrier keeps the scalp happy and prevents that dreaded sting.
Research from the Wimpole Clinic highlights that carrier oils like jojoba, argan and coconut can actually enhance the hair‑growth benefits because they moisturise, strengthen and even regulate scalp sebum (see the full guide on the best carrier oils).
Choosing the right oil for you
- Coconut oil – rich in fatty acids, great for dry or brittle strands.
- Jojoba oil – mimics the scalp’s natural oil, perfect for oily or acne‑prone scalps.
- Argan oil – lightweight, adds shine and helps balance excess sebum.
- Rosehip or almond oil – excellent if you’re after extra UV protection and a silky finish.
For example, Mark (38, a busy dad) swears by a 2 % blend of rosemary in coconut oil after his morning shower – he says his hair feels less brittle and he’s noticed a bit more volume after a month. Meanwhile, Sarah (45, a teacher) prefers jojoba because it keeps her scalp from feeling greasy while still giving her the soothing scent she loves.
Step‑by‑step dilution guide
- Gather your tools. You’ll need a clean glass dropper bottle (preferably amber), a small measuring spoon, and a medicine dropper.
- Measure the carrier. A teaspoon (≈5 ml) of carrier oil is a convenient base. That’s about 100 drops.
- Add rosemary. For a safe 2 % concentration, drop 2 drops of rosemary essential oil into the carrier. If you want the higher 3‑5 % range mentioned earlier, you can add 3‑5 drops – just watch for any tingling.
- Mix gently. Swirl the bottle or stir with a clean spatula until the oils look uniform. No shaking needed – you don’t want bubbles.
- Patch test. Dab a tiny amount on the inside of your wrist or behind your ear. Wait 15‑20 minutes; if there’s no redness, you’re good to go.
- Store correctly. Keep the blend in a cool, dark cupboard. The amber bottle shields the volatile rosemary compounds from light, preserving potency for up to six months.
That’s it – you’ve turned a potent essential oil into a scalp‑safe serum.
How to apply the blend
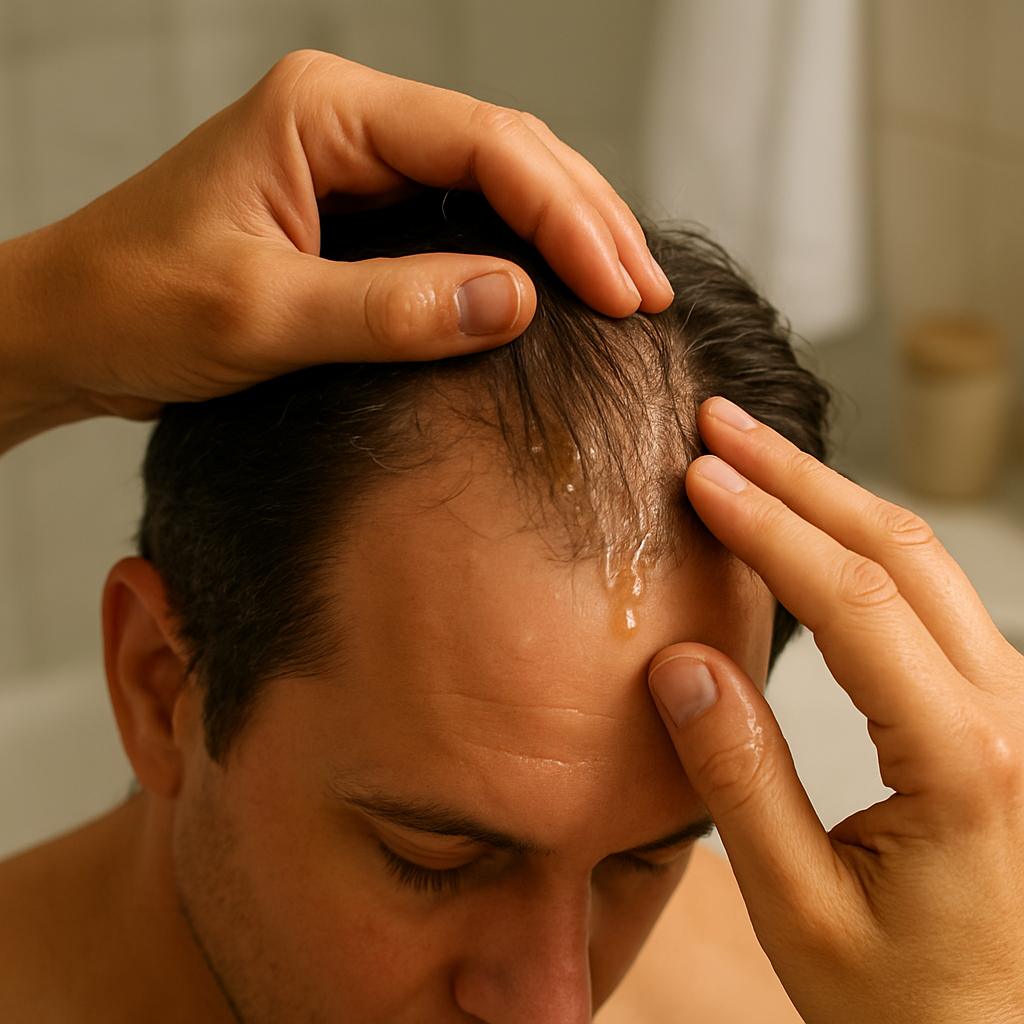
After you towel‑dry your hair, pour 3‑4 drops onto your fingertips. Massage in circular motions for about a minute, focusing on the crown and any thinning zones. The gentle friction not only spreads the oil but also boosts blood flow, amplifying rosemary’s effect.
If you prefer a leave‑in treatment, you can coat the length of your hair with a few extra drops and comb it through. Just remember to wash it out after 30‑60 minutes if you start to feel any greasiness.
Common pitfalls (and how to avoid them)
Ever wondered why some people get a rash after using essential oils? The culprit is usually a too‑high concentration or an incompatible carrier. Stick to the 2 % rule for the first two weeks, then gradually work up if your scalp tolerates it.
Another mistake is using water to dilute – oils don’t mix with water, so you’ll end up with a patchy mess. Always stick to non‑volatile carrier oils as outlined above.
Quick checklist
- Choose a therapeutic‑grade rosemary oil (pure, no fillers).
- Select a carrier that matches your scalp type.
- Measure 2 % dilution (2 drops per teaspoon of carrier) for beginners.
- Patch‑test before full application.
- Store in an amber bottle, away from heat.
- Massage for 1‑2 minutes, three times a week.
When you follow these steps, you’ll be practising the best version of “how to use rosemary oil for hair growth” – a safe, effective routine that fits neatly into your existing hair‑care schedule.
And if you want a little extra reassurance, the Harley Street Hair Transplant clinic summarises clinical evidence showing rosemary oil can match minoxidil’s performance in early studies (read the clinical overview here). That’s a solid reminder that a simple, well‑diluted blend can be a powerful ally.
Step 3: Prepare Your Scalp and Apply the Oil
Alright, you’ve got your rosemary‑essential oil mixed with the right carrier – now it’s time to treat your scalp like a garden that needs a bit of watering and weeding.
Why scalp prep matters
Think of a dry, flaky scalp as cracked soil. If you pour water on cracked earth, it just runs off. A clean, slightly damp scalp lets the rosemary molecules slip in and start working on those dormant follicles.
In practice, that means a gentle cleanse, a light towel‑dry, and a quick sanity check for any irritation. Even a brief scalp massage can prime the blood vessels, making the upcoming oil application far more effective.
Step‑by‑step scalp preparation
- Wash with a mild, sulphate‑free shampoo. Choose a formula that respects your natural oil balance – something like a gentle tea‑tree or kelp‑infused rinse works well for most over‑30 hair types.
- Rinse and towel‑dry. You don’t need to be bone‑dry; a damp surface helps the oil spread evenly and reduces the chance of a greasy feel later.
- Perform a quick patch‑test (if you haven’t already). Dab a tiny dab of your rosemary blend behind the ear or on the inside of your wrist. Wait 15‑20 minutes; no redness? You’re good to go.
- Detangle with a wide‑tooth comb. This step removes knots that could trap oil in clumps and ensures the blend reaches the scalp evenly.
Does this feel like a lot? Not really – it’s a routine you can slot in after your shower, and it only adds a minute or two.
Applying the oil – the hands‑on part
Now for the fun part. Pour 3‑4 drops of your rosemary‑carrier blend into the palm of your hand. You’ll notice the aroma right away – that fresh, herbaceous scent is a good sign you’re using a high‑quality oil.
Using your fingertips, start at the crown and work outward in small, circular motions. Imagine you’re drawing tiny whirlpools; each circle boosts micro‑circulation, which is exactly how rosemary helps hair grow. Spend about 60‑90 seconds total, focusing on any thinning zones.
Here’s a real‑world snapshot: Mark, a 42‑year‑old accountant, found that massaging for a full minute each session helped him feel the scalp “warm up” – a sign of increased blood flow. After four weeks, he noticed less shedding on his pillow. Sarah, a 48‑year‑old teacher, prefers a gentler two‑minute massage because her scalp is on the sensitive side. Both stick to the same 2 % blend and see steady improvement.
Once you’ve covered the whole scalp, you can let the oil sit for 5‑10 minutes. If you’re short on time, a quick 5‑minute pause is enough to let the active compounds penetrate. For an overnight boost, just remember that some users report mild irritation if left too long – a good rule of thumb is to start with a short dwell time and increase only if your skin tolerates it.
When the timer’s up, rinse with lukewarm water and follow with a light conditioner if needed. You’ll notice a subtle shine and a fresh scent that lingers throughout the day.
Pro tips from the lab
• Read the detailed guide on rosemary oil benefits for a deeper dive into why those terpenes matter.
• Dermatologist advice on patch testing reminds you to keep the initial dose low – especially if you’ve got a sensitive scalp.
And remember, consistency is king. Aim for three sessions a week, keep the concentration at 2‑3 % for the first month, then gauge how your scalp feels before nudging it up a notch.
So, what’s the next move? Grab your blend, give your scalp a quick cleanse, and start that soothing massage. In a few weeks you’ll start noticing a healthier feel, and maybe even a few extra strands popping up where you least expect them.
Ready to make it a habit? Set a reminder on your phone for “Scalp Massage” on Monday, Wednesday and Friday – you’ll never miss a beat.
Step 4: Treatment Schedule, Safety & Comparison of Options
Alright, you’ve mixed your rosemary blend and you’re ready to make it a habit. The real question now is – how often should you use it, and how do you keep it safe while weighing it against other hair‑loss tools?
Finding a schedule that sticks
Most of us juggling work, family and a few hobbies find three sessions a week to be the sweet spot. It’s enough to keep the circulation boost going, but not so much that the scalp gets overwhelmed.
Here’s a quick weekly grid you can paste on your fridge:
- Monday – 2 % rosemary blend, 1‑minute scalp massage.
- Wednesday – Same routine, but add a gentle tug‑out of any loose strands before you massage.
- Friday – Keep the 2 % blend, extend the massage to 90 seconds if you have the time.
If you’re new to essential oils, start with a 1 % dilution for the first two weeks and watch how your scalp reacts. Once you’re comfortable, you can nudge the concentration up to 3 % – just keep an eye on any tingling or redness.
Safety first – patch testing and irritation checks
We can’t stress this enough: always do a patch test. Dab a drop behind your ear or on the inside of your wrist, wait 15‑20 minutes. No flare‑up? You’re good to go.
And remember, rosemary oil is potent. If you notice itching, scaling or a burning sensation, rinse immediately with cool water and drop the concentration back down. In a handful of cases, people with very sensitive skin may need to stay at the lower 1‑2 % range.
Comparing rosemary oil with other go‑to options
It helps to see where rosemary sits on the hair‑care landscape. Below is a concise table that pits it against two popular alternatives – minoxidil and a ketoconazole shampoo – focusing on frequency, side‑effects and cost.
| Option | Typical Frequency | Safety / Side‑effects | Cost (per month) |
|---|---|---|---|
| Rosemary oil (2‑3 % blend) | 3× per week | Generally mild; possible irritation if over‑diluted | £10‑£20 (oil + carrier) |
| Minoxidil 5 % | Twice daily | Can cause scalp itching, dryness, rare dermatitis | £25‑£35 |
| Ketoconazole shampoo | 2‑3× per week (wash‑in) | May cause mild irritation; antifungal action can be drying | £15‑£30 |
What does that mean for you? If you’re over 30 and prefer a natural, low‑cost routine that fits into a busy schedule, rosemary oil checks a lot of boxes. It doesn’t demand twice‑daily applications, and the side‑effect profile is far gentler than synthetic minoxidil.
Real‑world examples
Take Claire, a 41‑year‑old graphic designer. She tried a daily minoxidil regimen for six months but complained about persistent scalp itch. She switched to a 2 % rosemary blend on Monday, Wednesday and Friday and, after three months, reported that the itch vanished and she could see a subtle thickening on her crown.
Then there’s Tom, 49, who uses a ketoconazole shampoo twice a week for dandruff control. He added a rosemary oil massage on the off‑days and noticed that his hair felt less brittle. The combo gave him a balanced routine without over‑loading his scalp.
Expert tip: stacking without over‑doing it
If you already use a medicated shampoo, keep the rosemary sessions on the days you don’t wash. That way you avoid layering too many actives at once, which can tip the scalp into irritation.
And if you ever feel unsure, you can always swing back to our Does Scalp Massage Help Hair Growth? guide for a refresher on gentle techniques and how to gauge progress.
Action plan you can start today
- Mark three days on your calendar – Monday, Wednesday, Friday.
- Prepare a 2 % rosemary‑carrier blend (2 drops rosemary per teaspoon carrier).
- Do a quick patch test if you haven’t already.
- After your shower, towel‑dry, then massage the blend for 60‑90 seconds.
- Rinse after 5‑10 minutes or leave on if your scalp feels comfortable.
- Log any changes (shedding, itch, new growth) in a simple notebook.
Stick with this rhythm for at least eight weeks before deciding whether to up‑the concentration. Consistency, not intensity, is the secret sauce for rosemary oil.
Lastly, if you’re hunting for a reputable source of high‑quality rosemary oil, a quick search on a trusted natural‑remedies site can point you toward organic, therapeutic‑grade options – just double‑check that the product lists 100 % pure Rosmarinus officinalis.
Step 5: Boost Results with Lifestyle and Complementary Products
So far you’ve got the oil mixed, the scalp prepped, and a schedule you can actually stick to. But what if we told you there are a few everyday habits that can nudge that rosemary routine from “nice‑to‑have” to “real results”?
Mind the diet – food that feeds the follicles
Hair needs building blocks, so think of your meals as the foundation under the oil. Aim for protein‑rich foods like eggs, lentils, or Greek yoghurt; they supply the keratin your strands crave.
Don’t forget iron and zinc – low levels are a common silent cause of thinning after 30. A handful of pumpkin seeds or a lean steak a couple of times a week can keep the scalp’s blood supply humming.
And yes, the herb itself helps circulation, but pairing it with a Mediterranean‑style diet (olive oil, leafy greens, fish) just amplifies that blood‑flow boost.
Stress‑management tricks that actually work
Stress spikes cortisol, and cortisol can push hair follicles into a resting phase. That’s why many of our clients swear by a 10‑minute evening walk or a quick breath‑work session.
Try the “5‑4‑3‑2‑1” grounding technique right after your rosemary massage: name five things you see, four you can touch, three you hear, two you smell (hello, rosemary!), and one you taste.
It feels a bit cheesy, but those few seconds can drop your heart rate enough to keep the follicles from “going on strike.”
Sleep: the hidden growth accelerator
We all know the cliché about beauty sleep, but the science is real. During deep sleep, the body releases growth hormone, which trickles down to the scalp.
If you’re consistently under seven hours, set a “no screens after 9 pm” rule and consider a lavender pillow spray – the scent is soothing without interfering with rosemary’s aroma.
Even a short power‑nap on a lazy Sunday can give your follicles a little extra push.
Complementary products that play nicely
Some over‑the‑counter goodies can sit on the same calendar as your rosemary oil without causing a clash. Here are three that we’ve seen work well with the routine above:
- Biotin‑rich supplement – 2,500 µg a day can fill any micronutrient gaps. Just check the label for any added caffeine if you’re sensitive.
- Niacin‑boosting serum – a light, water‑based serum applied after the oil can widen scalp vessels, letting more of that rosemary‑derived circulation get through.
- Gentle, sulphate‑free shampoo – a low‑foam, pH‑balanced formula keeps the scalp clean without stripping the carrier oil you left on.
Make sure you use the shampoo on the non‑oil days – that way you avoid layering too many actives at once, a tip we highlighted earlier.
When to consider red‑light therapy
If you’re looking for a tech‑side boost, red‑light devices have shown promise for hair follicles. Pairing a short (5‑minute) session on a non‑oil day can deepen circulation without over‑stimulating the scalp.
Just remember: the device should be FDA‑cleared and used at the recommended distance – you don’t want to turn your bathroom into a sauna.
Quick daily checklist
- Morning: protein‑rich breakfast, 2‑drop rosemary blend after shower.
- Mid‑day: 5‑minute breath‑work or walk.
- Evening: sulphate‑free shampoo (if it’s a wash day), then biotin pill.
- Before bed: 10‑minute screen‑off wind‑down, lavender pillow spray.
- Twice a week (non‑oil days): 5‑minute red‑light session.
Stick the list to your fridge or set a reminder on your phone – the easier it is to see, the more likely you’ll follow through.
What the research says
A study quoted by Healthline found that men with androgenetic alopecia who massaged diluted rosemary oil twice daily for six months saw a comparable increase in hair thickness to those using minoxidil, with fewer reports of itching.
That’s a solid reminder that the oil itself does the heavy lifting, but the lifestyle habits we’ve just covered keep the whole system in balance.
Give these tweaks a go for the next four weeks, log any changes in your hair diary, and you’ll start to see whether the combo feels like a subtle lift or a genuine breakthrough.
Step 6: Monitor Progress and Know When to Seek Professional Help
Alright, you’ve got your rosemary‑oil blend, you’ve nailed the schedule, and you’re feeling hopeful. The next question is simple – are you actually seeing the change you want, or is it time to call in a pro?
Set up a hair‑growth diary
Grab a small notebook or a notes app and jot down three things each week: the date you applied the oil, how many drops you used, and any noticeable reactions – itching, tingling, or that odd “shedding” phase. A quick line like “Week 2, 2 % blend, slight scalp warmth, no redness” does the trick.
Why a diary? It turns vague feelings into data you can actually compare. When you look back after four weeks you’ll spot trends you’d otherwise miss.
Take photos – the visual proof
Pick a spot on your scalp that you can see in the mirror – the crown, the hairline, or a thinning patch. Snap a photo in the same lighting, same angle, same distance every two weeks. Even a subtle shift in density becomes obvious when you line the images up.
Don’t expect a Hollywood‑style transformation after a month. The research from the Wimpole Clinic notes that most people start to see measurable changes after three to six months, with some early “shedding” as old hairs make way for new growth (see the study details). If you see a tiny increase in coverage after that period, you’re on the right track.
What normal progress looks like
Typical signs of a healthy response include:
- Less daily shedding – you might notice fewer strands on your pillow or in the shower drain.
- A faint “thickening” feeling when you run your fingers through the treated area.
- Reduced scalp irritation compared with the first few weeks.
If you’re still losing a lot of hair after six weeks, or the scalp feels constantly inflamed, that’s a red flag.
When to pause or adjust
Listen to your scalp. If you get redness, burning, or a rash that lasts more than 15 minutes after application, rinse the oil off and drop the concentration back to 1 % for a week. Sometimes the blend just needs a slower build‑up.
Plateaus happen. If you’ve logged consistent use for eight weeks and the diary shows no improvement, consider swapping the carrier oil (e.g., from coconut to jojoba) or adding a complementary product like a biotin supplement. Small tweaks can reignite the process.
Know the warning signs that need a professional
Even the most natural routine isn’t a cure‑all. Seek a trichology consultation if you notice any of the following:
- Sudden, excessive hair loss that’s out of proportion with normal shedding.
- Persistent scalp pain, persistent redness, or oozing sores.
- Rapid widening of the hair‑loss pattern (e.g., the Norwood scale advancing by more than one level in a few months).
A specialist can check for underlying hormonal issues, thyroid imbalances, or severe androgenetic alopecia that might need prescription‑strength DHT blockers or low‑level laser therapy.
Quick checklist to keep you on track
- Log each application – date, concentration, any sensations.
- Take side‑by‑side photos every two weeks.
- Watch for the three normal signs: less shedding, mild thickening, reduced irritation.
- If any red‑flag symptom appears, rinse, reduce concentration, and book a trichology consult.
Remember, consistency is the secret sauce, but it’s the data you collect that tells you whether the sauce is working or if you need a new recipe.
So, keep that diary, snap those photos, and don’t be afraid to reach out to a professional when your scalp is sending you a SOS. Your future self will thank you for the diligence.
Conclusion
We've walked through every step of how to use rosemary oil for hair growth – from picking a pure, therapeutic‑grade bottle to mixing, massaging and tracking your progress.
So, what does that mean for you? It means you can start a low‑cost, low‑risk routine today, using just a few drops and a few minutes of scalp massage three times a week.
Remember the basics: pure oil, 2 % dilution, patch test, gentle circular motions, and a simple diary. If you notice less shedding, a subtle thickening feeling, or a calmer scalp you’re on the right track.
But don’t forget the warning signs we highlighted – sudden excess loss, persistent redness or pain should prompt a trichology consult.
In our experience at Julian Jay, most people over 30 see a noticeable improvement after eight weeks when they stay consistent and tweak the carrier if needed.
What's the next step? Grab your rosemary blend, set a reminder for Monday, Wednesday and Friday, and start logging what you see. Let the data guide you, and don’t be shy about reaching out to a professional if the scalp starts sending an SOS.
Finally, think of this routine as a habit you’re building for the future you – a healthier scalp, fuller strands and a confidence boost that lasts.
FAQ
How often should I apply rosemary oil for hair growth?
Most of us over 30 find three applications a week hit the sweet spot – it’s enough to keep circulation humming without over‑loading the scalp. Aim for a 2 % dilution (two drops per teaspoon of carrier) on Monday, Wednesday and Friday. If your skin feels tingly, drop back to 1 % for a week, then ease back up.
Can I use rosemary oil on a wet scalp?
Yes, a slightly damp scalp actually helps the oil spread evenly. After you towel‑dry, pour three to four drops of your blend into your fingertips and massage in gentle circles. The moisture acts like a slip‑agent, so you won’t end up with greasy patches. Just avoid using water‑based diluents – oils and water don’t mix.
What carrier oil works best with rosemary for hair growth?
It depends on your scalp type. Jojoba mirrors your natural sebum, making it ideal for oily scalps. Coconut adds extra moisture for dry or brittle hair, while argan offers a lightweight shine for normal to combination scalps. Mix the carrier first, then add the rosemary drops – that way you keep the concentration accurate.
Do I need to leave the oil on my scalp or rinse it out?
Both approaches work, but most beginners start with a short dwell time. Let the blend sit for five to ten minutes, then rinse with lukewarm water. If your scalp tolerates it, you can leave the oil on for up to thirty minutes on non‑wash days. Just watch for any lingering irritation – if you feel burning, rinse sooner.
How long before I see results from rosemary oil?
Patience is key. Clinical notes from the Wimpole Clinic suggest measurable changes after three to six months of consistent use. You might notice less shedding within the first six weeks, and a subtle thickening feeling after eight weeks. Keep a simple diary – date, concentration, sensations – so you can spot trends before they become obvious in the mirror.
Is it safe to combine rosemary oil with other hair‑loss treatments?
Generally, yes, as long as you space them out. If you use a medicated shampoo like ketoconazole, apply the rosemary blend on the days you don’t wash. That prevents layering too many actives at once, which can trigger irritation. For minoxidil users, start with a low 1 % rosemary dilution and monitor how your scalp reacts before upping the strength.
What are the warning signs that I should stop using rosemary oil?
If you experience persistent redness, burning that lasts more than fifteen minutes, or a sudden surge in hair loss, it’s time to rinse, drop the concentration back to 1 %, and give your scalp a break for a week. Should the symptoms linger, book a trichology consult – sometimes underlying hormonal or skin issues need professional attention.